How to Record with your Apollo Setup
Written by ADMIN on 19/12/2022
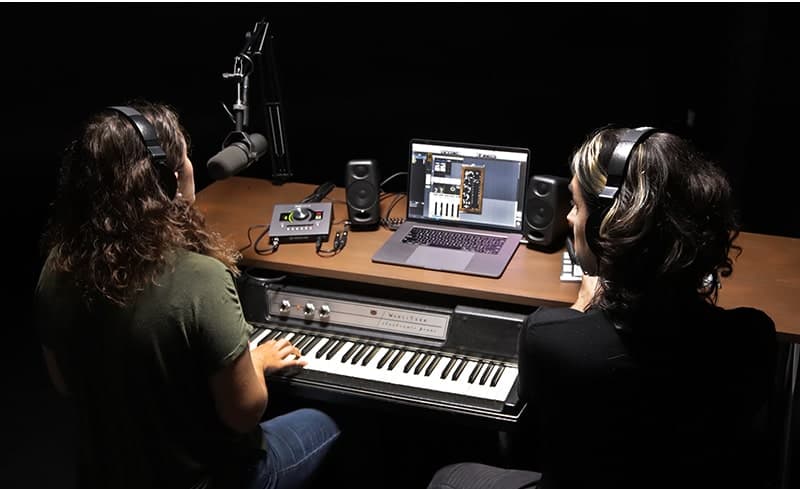
We show you how to set up your Apollo and start recording audio using UAD plug‑ins.
We enlisted award-winning producer and engineer Fab Dupont (Shakira, Jennifer Lopez) to reveal the secrets to getting started with Apollo audio interfaces.
From setting up your mic or instrument and monitoring audio through plug-ins, to recording with easy analog-style workflows in LUNA, consider this your guide to getting album-ready sound quickly with Apollo.
Craft your Sound in the Console App
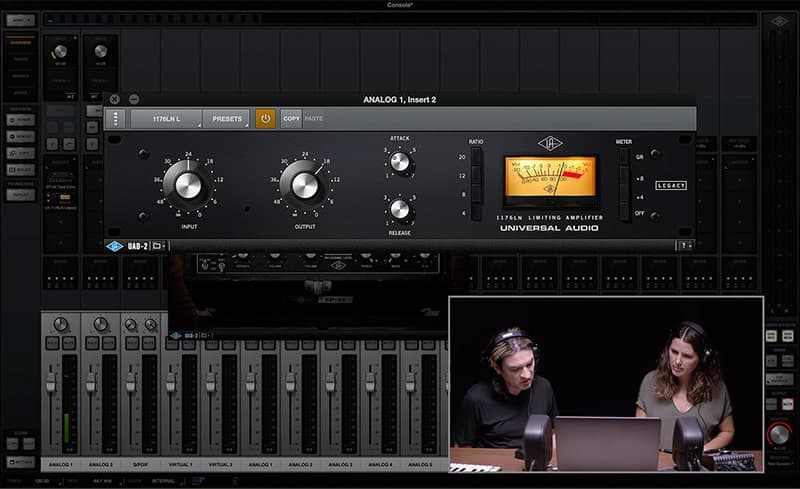
The Console application comes free with every Apollo and acts essentially as a digital representation of your Apollo’s inputs, outputs, and routing capabilities. Console allows you to route and monitor your audio, adjust Apollo’s hardware functions such as input gain and monitor volume, apply UAD plug-ins to your voice or instrument, and much more — all before your audio reaches a DAW.

“Console is basically an abstraction of what’s going on inside your Apollo,” says Dupont. “Think of it as a stage on the way to your recorder. You use it to craft your sound before it reaches your DAW.”
How to Use Plug‑Ins for Easy Inspiration
Nothing beats the feeling of singing or playing an instrument in a room with natural ambience. Whether it’s the echo in a certain hallway of your house, or the proverbial reverb effect from a tiled bathroom, we get our best performances when we are comfortable with how we sound.
You can use plug‑ins such as the EP‑43 Tape Echo or Capitol Chambers Reverb to get these same effects and make the sound in your headphones or studio monitors more polished and inspiring. And it’s easier than you might think.
After powering up your Apollo and opening the Console app or LUNA Recording System, you can start hearing yourself through plug-ins in a few easy steps:
1) Plug a mic or instrument into your Apollo and set your input gain
2) From Console’s Input view or LUNA’s Mixer view, click the “INSERTS” tab
3) Choose from your available plug-ins and load a preset that matches your source
Watch: How to Load Plug‑In Presets in Console
Get Pro Studio Sound with Unison
Unison™ technology allows your Apollo’s mic preamps to sound like real analog hardware. Using these plug-ins can give your recordings the studio-quality tone, clarity, and response of legendary mic preamps from Neve,® API,® SSL,® Manley,® and more.
Want to get better sounding vocal recordings quickly? Try adding a Unison plug‑in such as the Manley Tube Preamp or Helios Type 69 Preamp & EQ to your track and browsing through the presets until you find a sound that works for you.
Here’s how you load a Unison plug‑in for vocals:
-
1) In the Console app or LUNA, click the dedicated “UNISON” insert tab
2) Choose a Unison plug‑in from the “PREAMP & CHANNEL STRIP” category
3) Find a setting in the Presets tab that matches your source
Learn More: How to Set up Unison Technology with Apollo
Monitor Mode or Record Mode
Now that you’ve dialed up inspiring sound in your headphones or speakers using plug–ins, it’s time to consider whether you will commit those plug–ins to your recording, or just use them for extra inspiration while you rehearse or record takes.
“In Console, there are two modes: Monitor mode and Record mode,” explains Dupont. “In Monitor mode you hear the plug-ins through your headphones or monitors, but the audio that is sent to your DAW is unaffected. In Record mode, your DAW captures whatever plug-ins you have loaded onto the track.”
If you’re wondering which mode to use, here’s what Dupont has to say: “Use Record mode if you feel 100% confident that the sound you hear in your headphones is what you want on your recording. Monitor mode is useful when you are trying to get a more ‘vibey’ and inspiring sound in your headphones, but you want your recording to be clean or ‘unprocessed’ when it arrives in your DAW.”
“For the most low‑latency recording experience, I recommend you check out LUNA.”
LUNA: Create with Easy Analog Workflows
Every Apollo interface comes with LUNA Recording System – Universal Audio’s DAW for mac that integrates seamlessly with Apollo.
“The thing that really gets me about LUNA is how it works with Apollo and Console,” says Dupont. “When you create a new track in LUNA, all the work you did adding plug‑ins in Console automatically shows up.”
This seamless interaction between Apollo, Console, and LUNA combines to deliver super inspiring, low‑latency workflows. Plus, once you start using LUNA, you don’t have to go back and forth between your DAW and the Console app, or worry about enabling Low Latency Monitoring Mode in your DAW.

LUNA’s Accelerated Realtime Monitoring (ARM) allows you to record using plug-ins in real time, without latency.
Let’s Recap
Here is the most basic way to think about your recording workflow with Apollo:
Apollo is used to: Get audio into and out of your computer.
Console is used to: Monitor your audio, add effects, and control levels.
LUNA is used to: Record, mix, and master your audio using plug-ins.
UAD Plug-Ins are used to: Enhance and manipulate audio during and after recording.
The Stage is Yours
When it comes time to create, here are a few final tips from Fab on how to get the most out your recording experience with Apollo audio interfaces:
Enable Low Latency Mode
“If you are using a DAW other than LUNA, and using Console to monitor your audio, make sure you enable ‘Low Latency Monitoring’ in your DAW – without this mode enabled, you will hear your audio through the Console app and through your DAW.”
Get to Know LUNA
“For the most seamless low–latency recording experience, I recommend you check out LUNA. It’s friendly, easy to use, and it sounds bananas.”
Learn to Use ARM
“Use Accelerated Realtime Monitoring in LUNA to monitor audio tracks and virtual instruments. ARM allows you to work with plug-ins in LUNA in real time, with ultra low latency.”
New to the world of Universal Audio? If you’ve been considering a new audio interface, or want to browse the UAD plug–in library, click the links below to learn more.

 Siha Radio.lk


